Quick Start
Welcome! This guide will help you get up and running quickly with all the tools you need. By the time you've completed these steps, you'll have the software downloaded, your development environment configured, and all the information needed to get help when you need it.
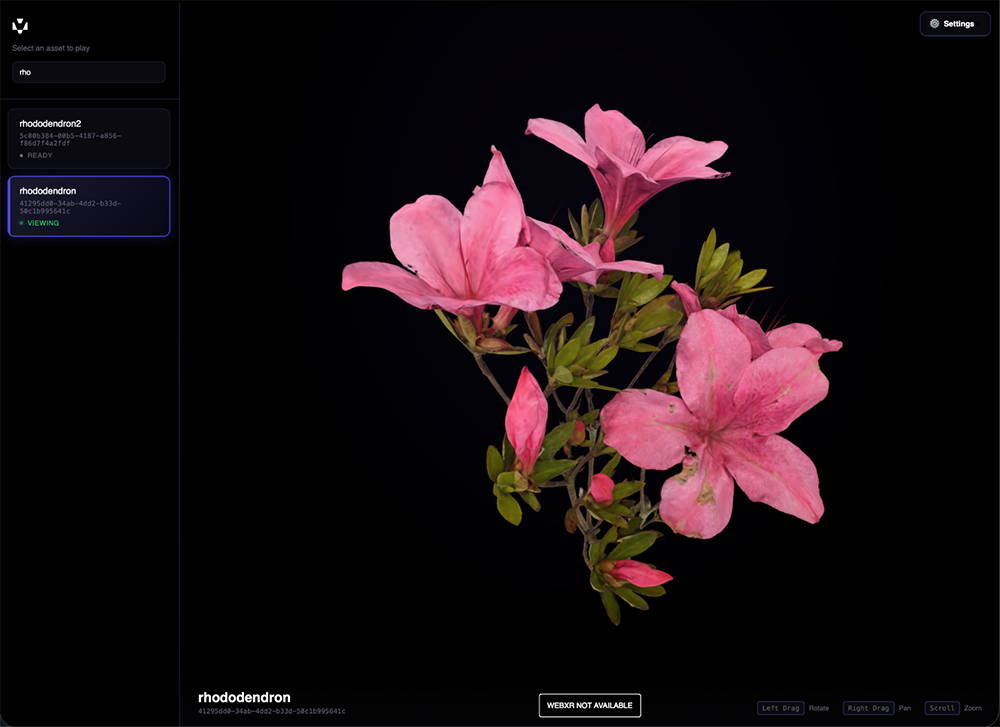
Want to see Miris streaming a 3D asset before setting anything up? Open the Interactive Playground — live 3D streaming starts immediately, no account required.
Prerequisites
Operating System Requirements For Development
- Windows: Windows 11
- Linux: Ubuntu 22.04 LTS
- macOS: macOS 15.0
3D Asset
You'll need a 3D asset to work with. There are two ways to get one:
- Upload your own USD file — The Miris Portal accepts USD, USDA, USDC, and USDZ files. You can download sample assets from the Sample Assets page to use as a starting point.
- Use a pre-processed asset — The Miris Portal includes a library of assets that have already been processed and are ready to stream. Log in to https://app.miris.com/ and browse the available assets to get started immediately without any upload or conversion step.
Browser Compatibility
The Miris Web SDK works on modern browsers that support WebGL 2.0 and ES6 modules.
| Browser | Minimum Version | Notes |
|---|---|---|
| Google Chrome | 90+ | Full support, recommended |
| Mozilla Firefox | 88+ | Full support |
| Apple Safari | 14+ | Full support (including iOS 14+) |
| Microsoft Edge | 90+ | Full support |
Miris Portal
The Miris Portal is the easiest way to interact with your assets and access necessary Viewer Keys for Development.
Access the Miris Portal at https://app.miris.com/. Note: A valid login is required.
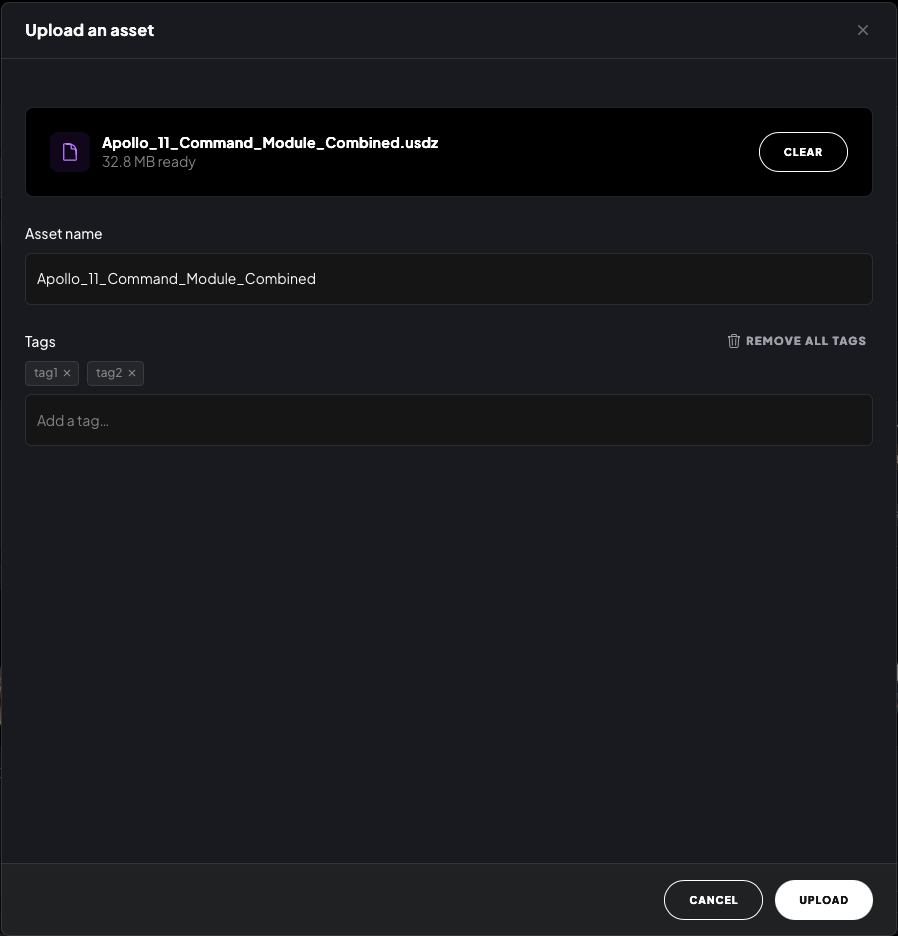
Upload Asset
Need an asset to work with? Grab one of our samples from the Sample Assets page.
To upload an asset:
- Select the New Asset button in the upper right corner
- Select your USD file or folder containing your asset and associated files (USD, USDA, USDC, and USDZ files are supported)
- Choose a name for your asset and add tags
- Press Upload — Miris will begin generating a Preview of your asset
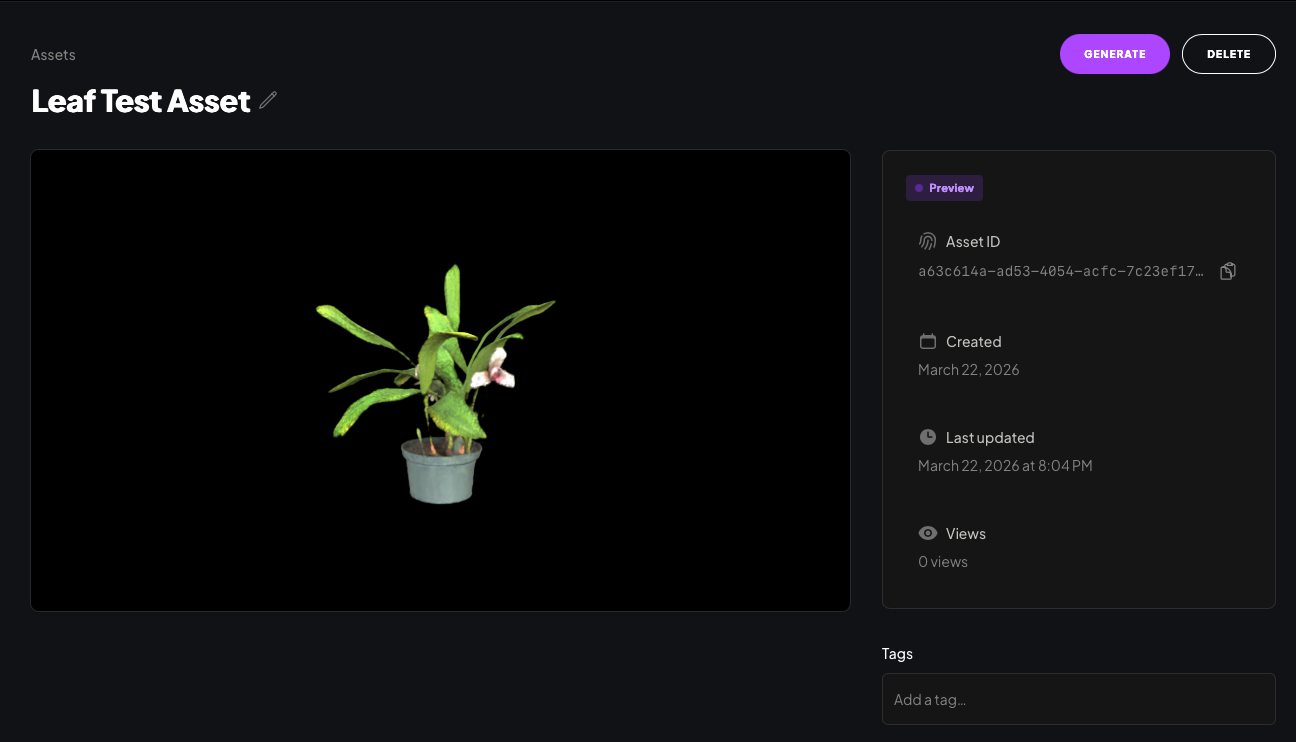
Preview
A Preview is a lower-fidelity version of your asset, typically ready in 5–10 minutes. It lets you check lighting, color, and overall appearance before spending a generation credit.
- Once your Preview is ready, open the asset to review it
Generate Streamable Asset
If you're happy with the Preview, you can generate the full high-fidelity streamable asset.
Generating a Streamable Asset uses one of your 5 monthly high-fidelity credits.
- Press Generate to start processing — this produces the streaming-optimized asset that works in the Miris player and WebSDK
- Once processing is complete, your asset is ready to stream using its Asset ID
Access Asset ID
From the Asset Detail View, you'll see a panel to the right of the Asset Viewer containing:
- Stream status
- Asset ID
- Asset creation date
Click the copy icon to copy the UUID and paste it into your project.
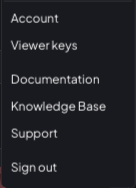
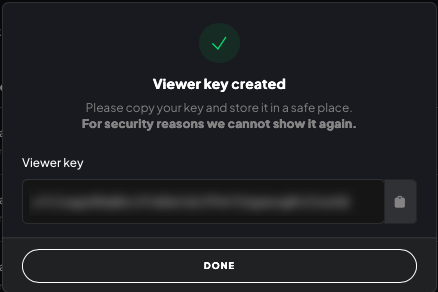
Access Viewer Key
Asset Viewer keys are required across the Miris ecosystem to access streamable content.
To create a Viewer Key in the Portal:
-
Click your user account in the upper right corner
-
Select Viewer keys
-
Enter a Key Name, choose an Expiration date, and optionally add Tags
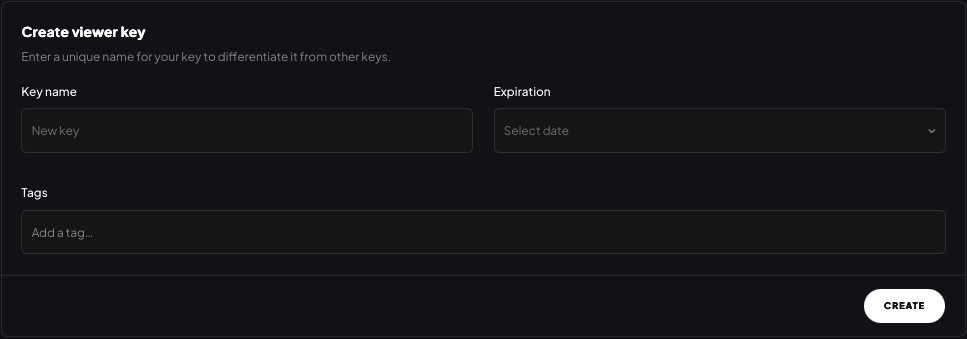 Scoping access with tags
Tags limit which assets a viewer key can access. A key tagged
product-demowill only stream assets with that tag. A key with no tags can access all of your assets. -
Press Create
-
Copy your Viewer Key (it will only appear once)
Miris Command Line Interface
The Miris CLI is an experimental feature. Commands and behavior may change in future releases.
Interact with Miris services through the command line by downloading the CLI.
Installation
Prerequisites:
- Download the latest CLI for your operating system from https://github.com/Miris-Inc/cli/releases/latest
- Create an account and log in to https://app.miris.com/
Installation Steps:
macOS:
- Expand the zip file
- Copy the Miris CLI to your preferred location in PATH
- Navigate to where you placed the CLI and run
miris - Follow the Logging In instructions below
Windows:
- Expand the zip file to your desired location
- Launch cmd.exe
- Navigate to where
miris.exeis located - Follow the Logging In instructions below
Linux:
- Expand the zip file
- Copy the Miris CLI to your preferred location
Verification: Run miris --version to verify successful install. You can execute miris commands via the command line with ./miris or by adding the directory to your PATH.
Logging In
After installing the CLI:
- Run
miris auth(ormiris auth oauthfor OAuth providers) - Copy the URL starting with
https://app.miris.com/authand paste it into your browser - Complete the login flow
- You should see "OAuth authentication successful!" in your terminal
- You may now close your web browser
Note: You may be logged out after a period of inactivity. Run the login flow again to reauthenticate.
Creating an Asset Viewer Key
Run the following command:
miris viewerkey create --name <yourKey'sName>
You'll be prompted to enter an expiration date in YYYY-MM-DDTHH:MM:SSZ format, or leave blank for no expiration.
Expected output:
Viewer Key created Successfully. Copy down the key as this is the only time it will be shown.

UUID: xxxxxxxx-xxxx-xxxx-xxxx-xxxxxxxxxxxx
Key:  xxxxxxxxxxxxxxxxxxxxxxxxxxxxxxxxxxxxxxx
Uploading Content
miris content upload <path/to/your/content> --name <yourContentName>
Example:
miris content upload ./fluffyDog.usd --name "Fluffy 3D Dog" --tags "blueMerle, australianShepherd"
Note: When uploading content with separate geometry and texture files, pass the root folder to the command line, not the .usd file. For example: miris content upload <path/to/your/content/> instead of miris content upload <path/to/your/content/fluffydog.usd>
Checking Conversion Progress
miris content get <yourAsset'sID>
Before Conversion:
Conversion Details:
ID:     xxxxxxxx-xxxx-xxxx-xxxx-xxxxxxxxxxxx
Status: pending
After Conversion:
Conversion Details:
ID:     xxxxxxxx-xxxx-xxxx-xxxx-xxxxxxxxxxxx
Status: completed
Accessing Your Asset
Once conversion is complete:
miris asset list --name "Your Asset's Name"
Expected output:
Name:       Fluffy 3D Dog
Asset ID:   xxxxxxxx-xxxx-xxxx-xxxx-xxxxxxxxxxxx
Tags:       [blueMerle, australianShepherd]
Created At: 2025-12-09 17:55:55
Thumbnail:  n/a
Content (1 items):
[1]
URL:  <path to your asset>
Type: default
Size: 384334 bytes
The Asset ID is the UUID you'll use in the SDK.
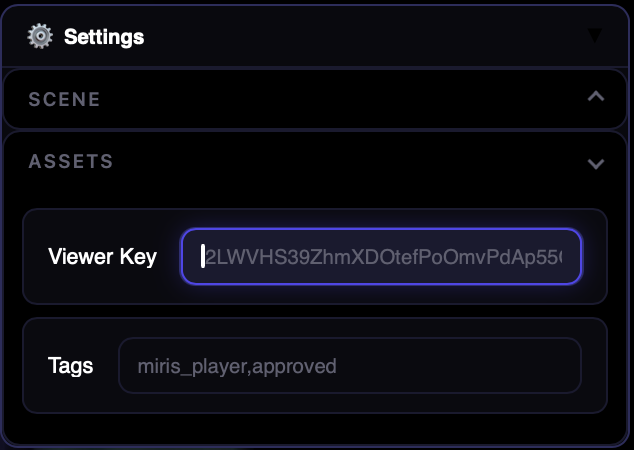
Online Viewer
Once you have a Viewer Key and processed assets, visit https://player.miris.com/
Viewing Assets
-
Click the Settings icon in the upper right corner
-
Paste in your Viewer Key
-
Optionally enter tags to filter your library
-
Select an asset to view
Example USD Files
Download Miris Sample Assets — curated assets tested and optimized for the Miris ecosystem.