Exporting USD from Houdini
Tested with Houdini Core 21.0.631 (Py3.11).
Overview
The goal is to produce a single, self-contained USD file with all geometry, materials, and textures using relative paths. The general workflow is:
- Open or import your source file
- Build the scene (geometry and materials)
- Add lights
- Set units
- Set color management
- Export USD
1. Open File
- In the main menu go to File → Set Project... and choose a location that contains your texture folder.
- In the Stage network, import your source asset using one of the methods below.
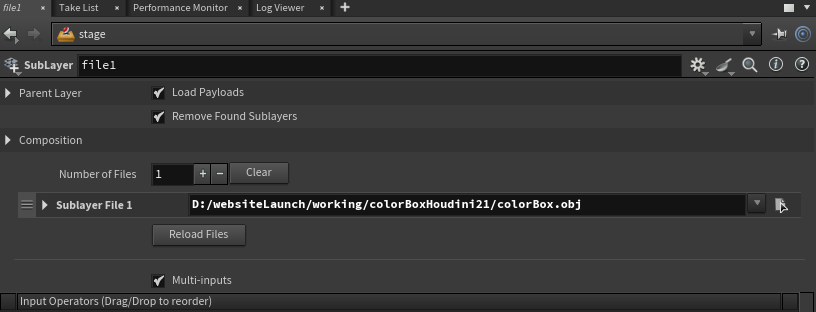
USD, OBJ, or FBX (no embedded textures)
Press Tab, search for Combine, and add a SubLayer node.
- Inside the SubLayer node: Composition → Sublayer File 1 → File — select your file.
OBJ or FBX at the Geometry level (no textures)
- Press Tab → Geometry and add a Geometry node. Enter it.
- Inside the Geometry node, press Tab → File and select your OBJ or FBX.
- Add a Null node and connect the File node into it.
- Return to Stage, press Tab → SOP Import, and point it at the Null.
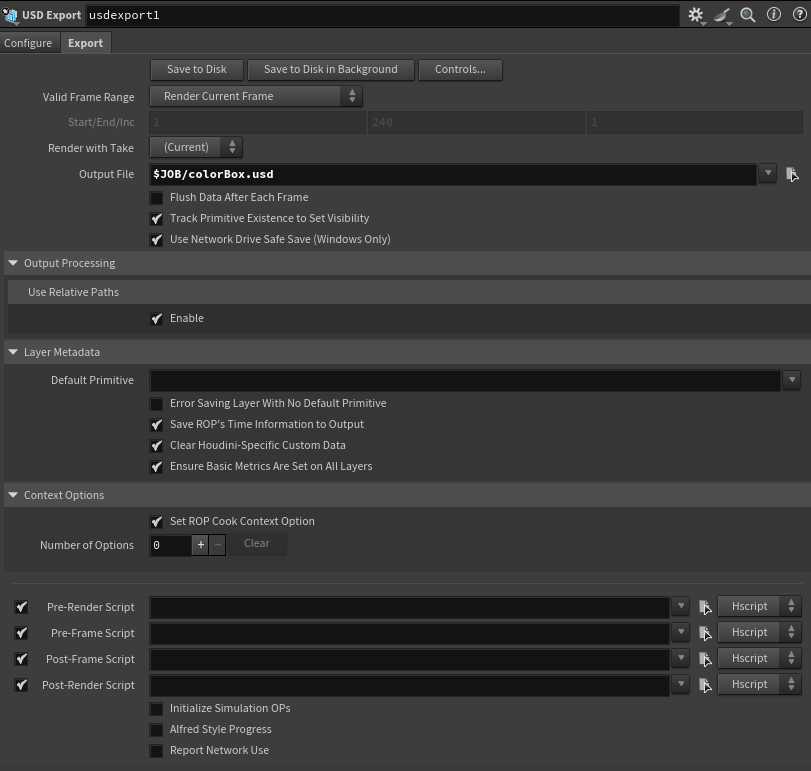
Inside the Geometry node you can also add a USD Export SOP to pre-configure the output path ($JOB/YourFileName.usd).
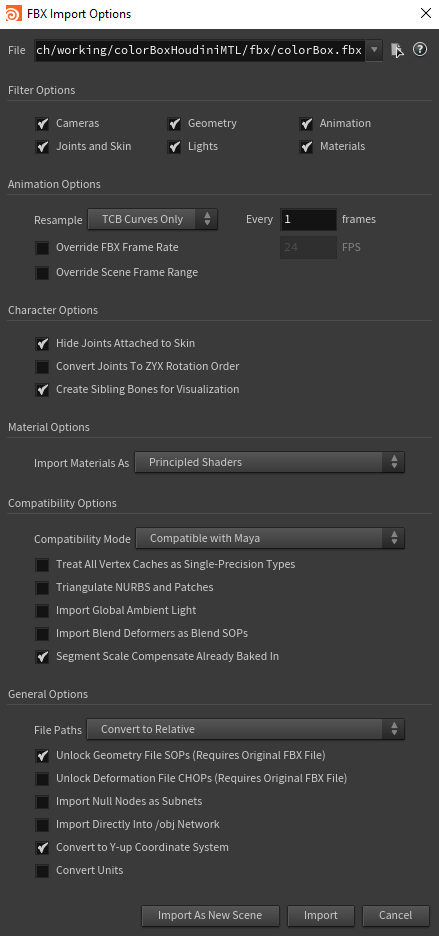
FBX with textures
Go to File → Import → Filmbox FBX... and use these import settings:
- Material Options → Import Materials As: Principled Shaders
- General Options → File Paths: Convert to Relative
OBJ with textures
Go to File → Import → Geometry..., select your OBJ, and click Accept.
Then navigate to obj → Subnetwork → Material Network and redirect any texture paths to your project's texture folder.
2. Build Scene
Geometry
Add any additional geometry as needed (e.g. a ground plane or reference cube).
Materials
- In the Stage network, press Tab → Materials → Material Library and add a Material Library node.
- Enter the Material Library node.
- Press Tab → MaterialX → USD MaterialX Builder and enter it.
- Press Tab → MaterialX → Texture 2D → MtlX Image to add texture nodes.
- Connect and configure as desired.
Apply materials only to the meshes that require them.
Assign Materials
Back in Stage, press Tab → Materials → Assign Material and connect your material assignments.
3. Add Lights
Lights will appear significantly darker in Miris than they do in the Houdini viewport. If you want an effective Intensity of 1 and Exposure of 1, try starting with Intensity: 70, Exposure: 3.5 and adjust from there.
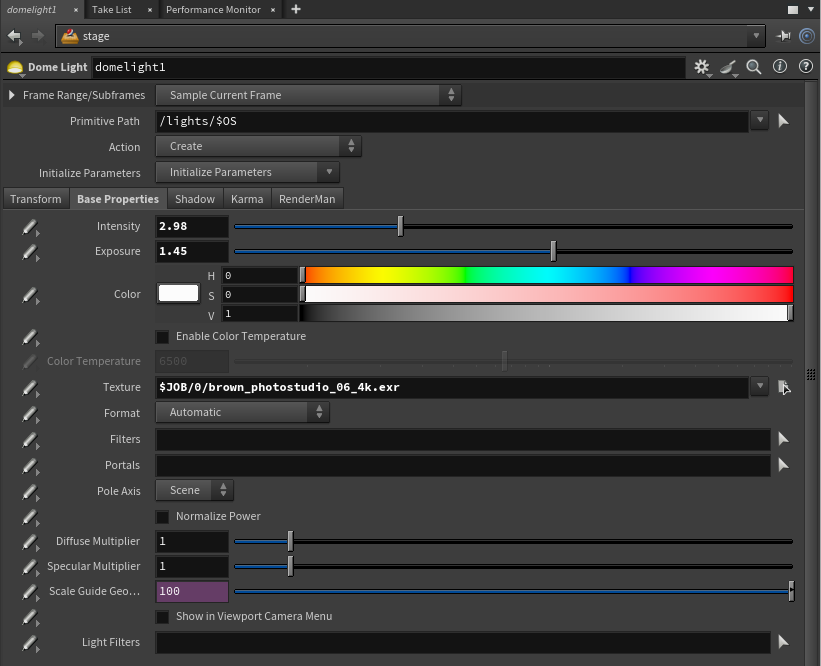
Dome Light (HDRI)
- Press Tab → Lights → Dome Light.
- Base Properties → Texture — select your HDRI file (
$JOB/[texture folder]/[hdri]). - Adjust Intensity and Exposure.
- Transform → Rotate — set to
(-90, 0, 0).
Distant Light
- Press Tab → Lights → Distant Light.
- Adjust Rotation, Intensity, and Exposure as desired.
Disabling light visibility to camera is not yet documented. If needed, experiment with the light's Render Visibility settings.
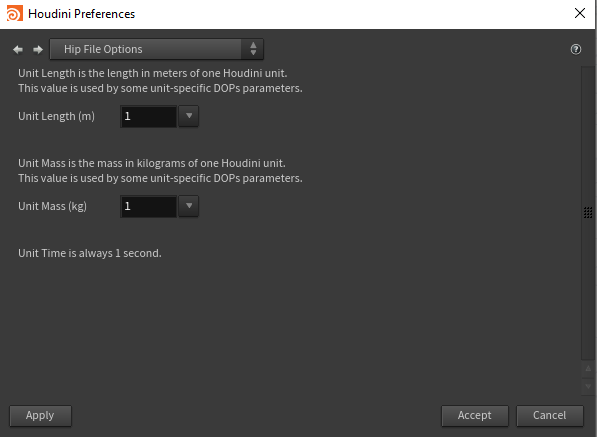
4. Set Units
- Go to Edit → Preferences → Hip File Options.
- Set Unit Length (m):
1. - Click Apply, then Accept.
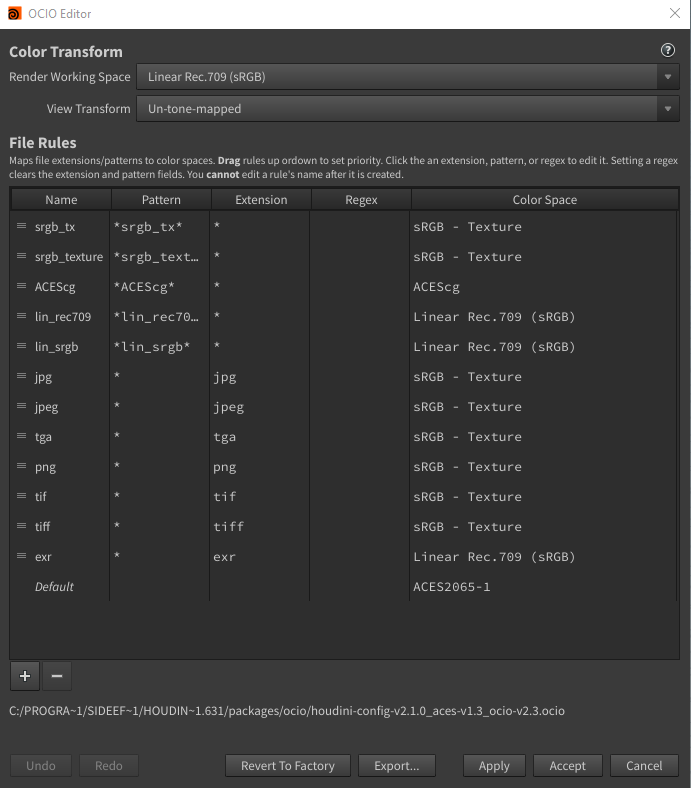
5. Color Management
- In the Display Options, set Color Correction to:
- Gamma:
2.2 - Lut: (empty)
- Apply to Background Image: ☑ enabled
- Gamma:

- Go to Edit → OCIO Settings... and confirm your OCIO configuration.
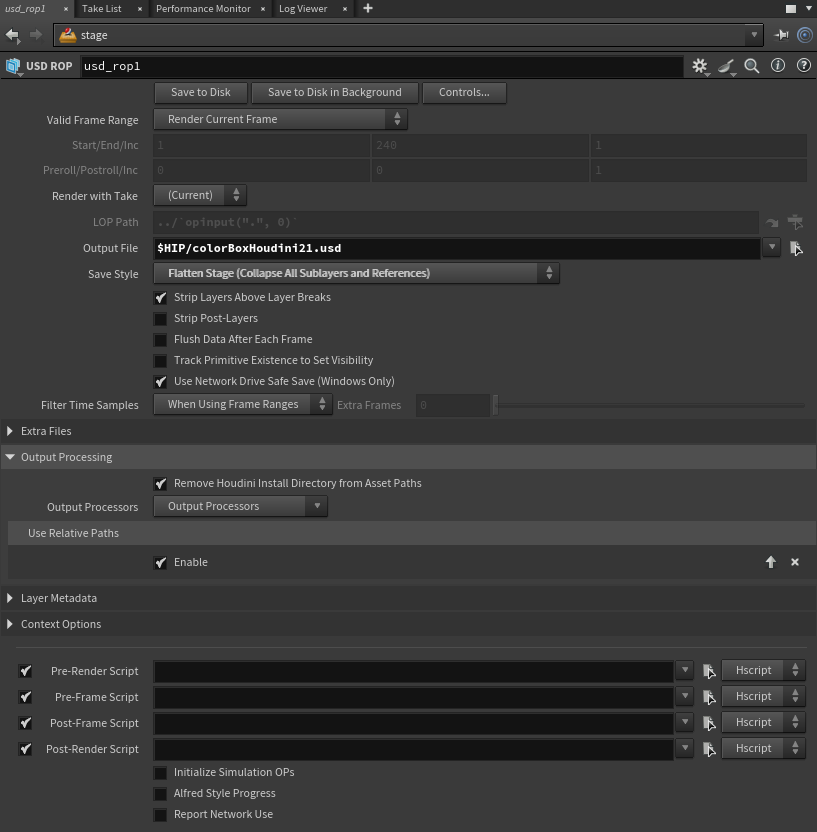
6. Save USD
- In the Stage network, press Tab → Managers → USD ROP.
- Set Output File to
$JOB/<YourFileName.usd>. - Set Save Style to Flatten Stage (Collapse All Sublayers and References).
- Under Output Processing → Use Relative Paths, enable ☑ Enable.
- Click Save to Disk.