Exporting USD from Maya
Tested with Autodesk Maya 2026.3.
Overview
The goal is to produce a single, self-contained USD file with all geometry, materials, and textures using relative paths. The general workflow is:
- Open or import your source file
- Build the scene (geometry and materials)
- Set units
- Set color management
- Export USD
- Add lights (via USD Layer Editor)
1. Open File
- Launch Maya.
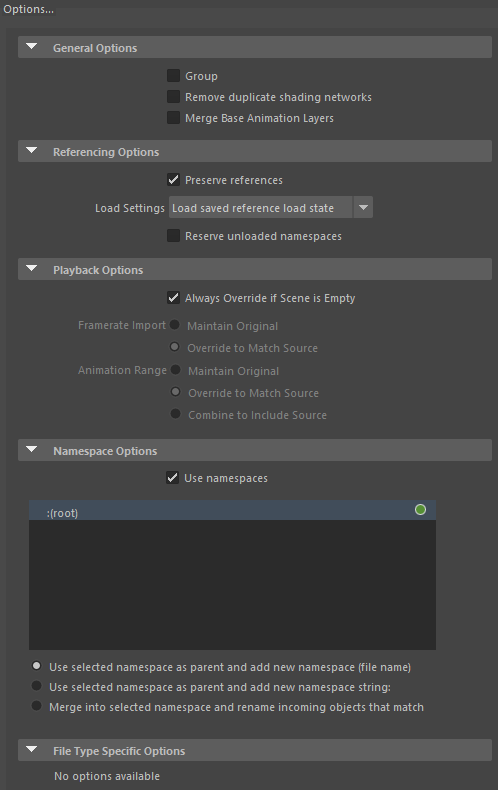
- If importing an asset (USD, OBJ, or FBX): File → Import...
- Click Options... and under Referencing Options enable ☑ Preserve references.
- Click Import.
- Open Hypershade and confirm that all textures are correctly referenced from your texture folder.
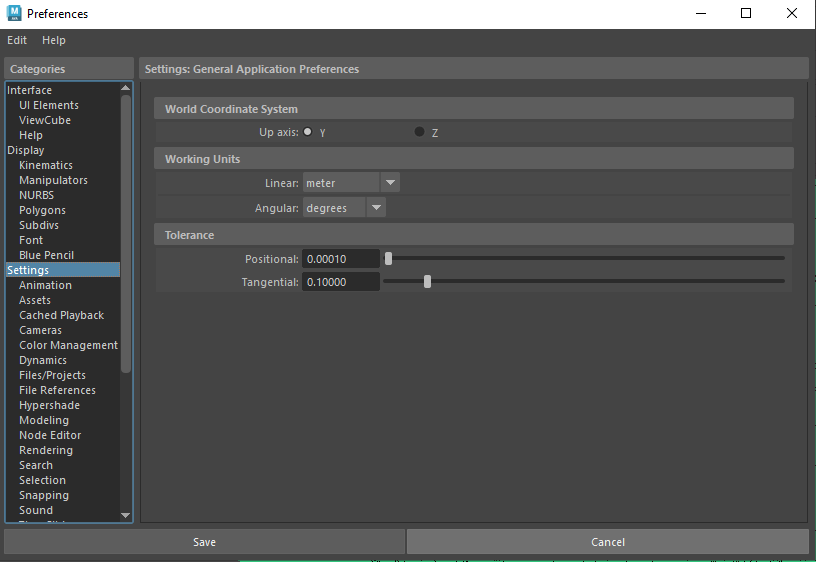
2. Set Units
- Go to Windows → Settings/Preferences → Preferences.
- Under Categories → Settings → Working Units, set Linear to meters.
- Click Save.
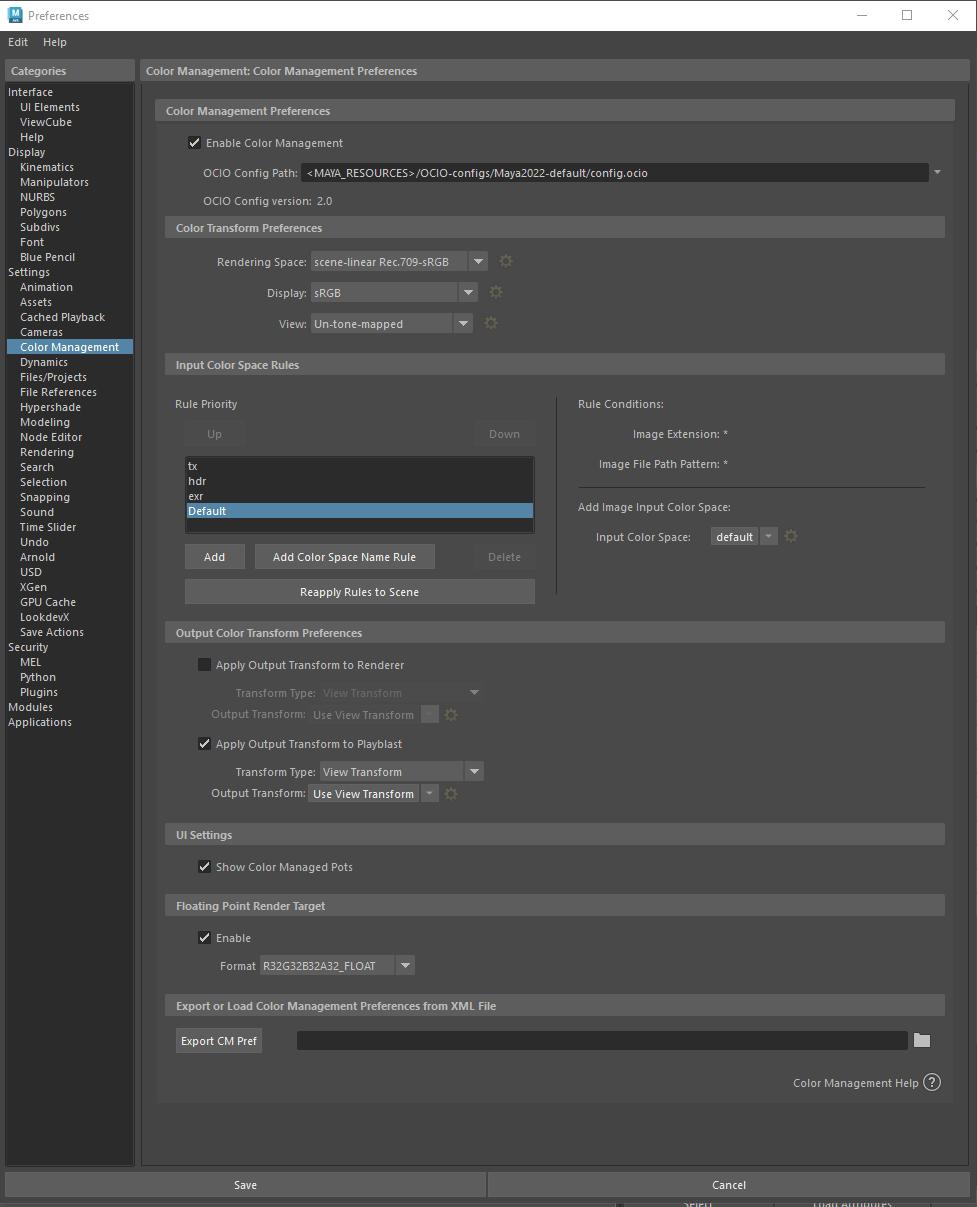
3. Set Color Management
- In Preferences, go to Categories → Color Management.
- Under Color Transform Preferences, set:
These values are pending confirmation. Verify with your pipeline before using.
| Setting | Value |
|---|---|
| Rendering Space | scene-linear-Rec.709-sRGB |
| Display | sRGB |
| View | Un-tone-mapped |
4. Build Scene
- Create or adjust geometry as needed.
- Open Hypershade and create materials (Lambert, Blinn, or Phong), adding textures from your texture folder.
Apply materials only to the meshes that require them.
LookdevX (MaterialX)
If you need MaterialX materials, open the LookdevX Graph Editor, create a new MaterialX, and add your desired surface material. This method is secondary to the standard Hypershade workflow.
5. Export USD
- Go to File → Set Project..., choose the folder containing your texture folder, click Set, then click Create default workspace.
- File → Save to save the current scene.
- Go to File → Export All...
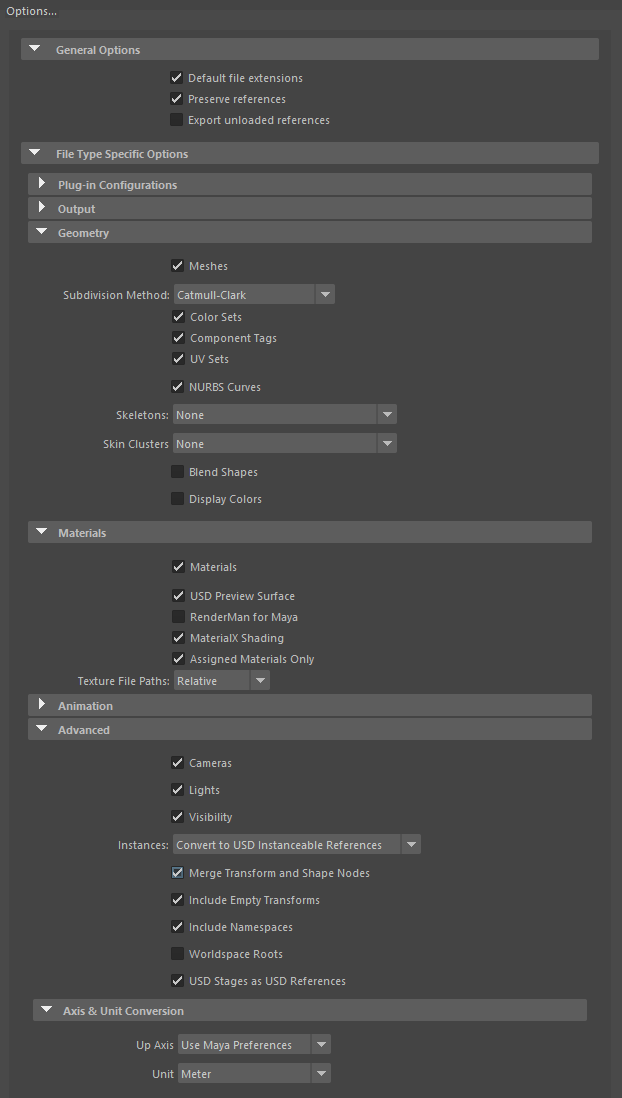
- In the export options panel, configure:
- General Options → ☑ Preserve references
- Materials — select the shading material used in the scene:
- ☑ USD Preview Surface
- ☑ MaterialX Shading
- Texture File Paths: Relative
- Set File name to
YourFileName.usd. - Set Files of type to USD Export.
- Click Export All.
6. Add Lights
Lights will appear significantly darker in Miris than they do in the Maya viewport. If you want an effective Intensity of 2 and Exposure of 2, try starting with Intensity: 10, Exposure: 9 and adjust from there.
Directional Light
Go to Create → Lights → Directional Light and adjust its position and intensity.
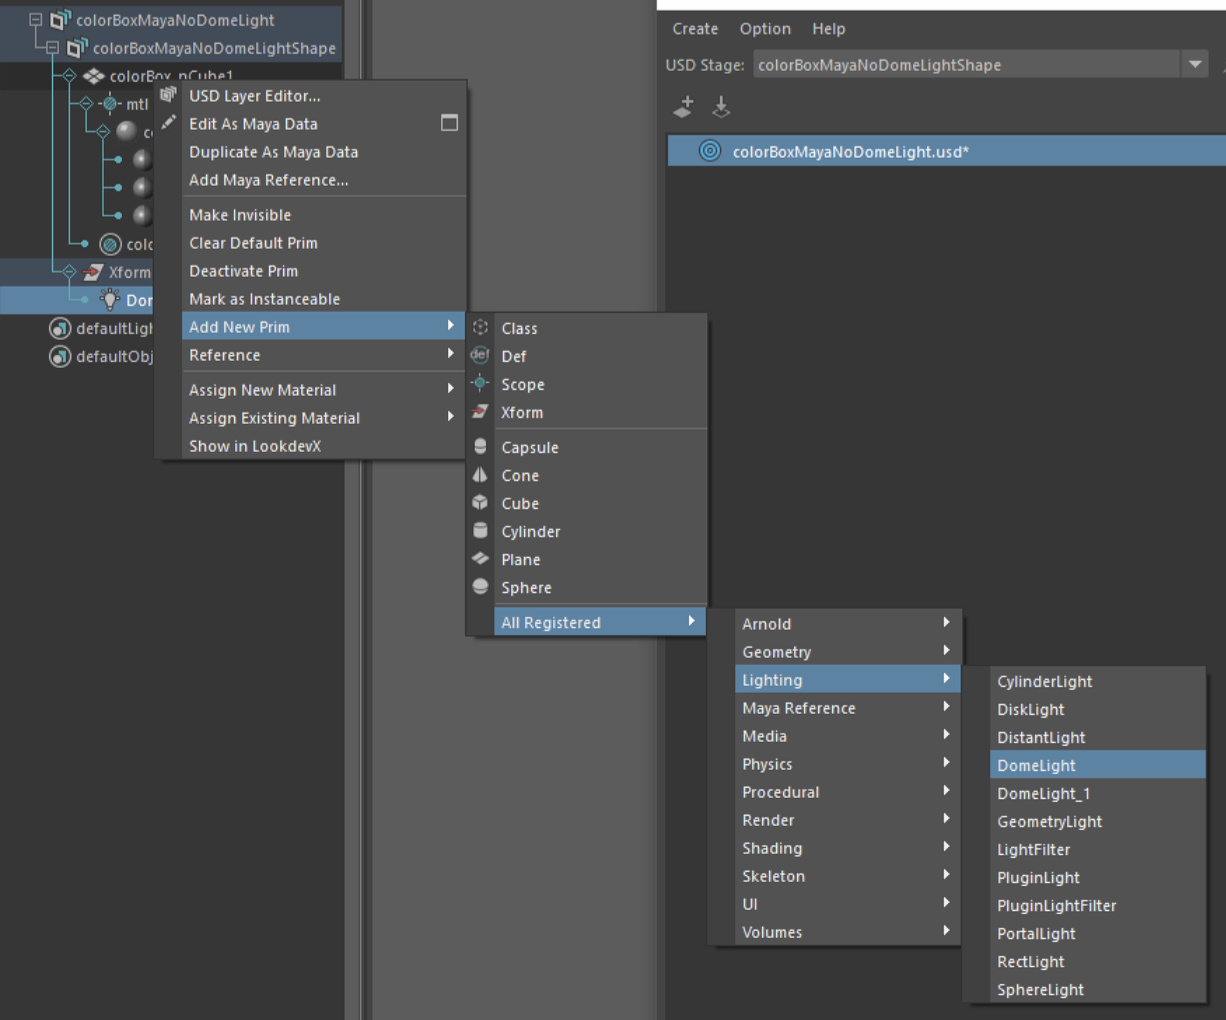
Dome Light (via USD Layer Editor)
To add a dome light or other USD-native lights, use a separate USD layer:
- Open a new scene in Maya.
- Go to Windows → USD Layer Editor.
- Click Create → Stage From File..., select your exported USD file.
- Enable ☑ Make Path Relative to Scene File, then click Create.
- In the Outliner, right-click your mesh and choose Add New Prim → All Registered → Lighting → DomeLight (or any other desired light type).
- Adjust the Intensity, Exposure, and Rotation of the light.
- To assign an HDRI:
- Select the Dome Light → Color Map → click the folder icon.
- Select your HDR file.
- Enable ☑ Make Path Relative to Edit Target Layer Directory.
- Click Open.
- Save the USD: right-click the USD layer in the Layer Editor → Save Edits, then click Save.